Conclusion
Halftone screen printing is a powerful technique that can significantly elevate the quality and complexity of your printed designs. By mastering the fundamentals outlined in this guide, you can create stunning halftone prints that showcase intricate details and smooth gradients.
Throughout this guide, we’ve covered the essential aspects of halftone screen printing, including:
- The basics of halftones and their importance in screen printing
- Key terminology used in halftone screen printing
- Step-by-step process for creating and printing halftones
- Advanced techniques like multi-color, FM, and hybrid halftones
- Troubleshooting common issues in halftone screen printing
Mastering halftone screen printing requires practice, patience, and a willingness to experiment. As you refine your technique, you’ll discover new ways to push the boundaries of your artistic vision. Whether you’re printing photorealistic images, creating complex gradients, or developing unique textural effects, halftone screen printing offers endless possibilities for creativity and innovation.
Remember that each step in the halftone screen printing process – from choosing the right software and adjusting settings, to selecting appropriate mesh counts and managing dot gain – plays a crucial role in the final outcome. Pay attention to these details, and don’t be afraid to fine-tune your approach based on the specific requirements of each project.
As the textile printing industry continues to evolve, staying up-to-date with the latest halftone screen printing techniques and technologies will be crucial. Keep experimenting, stay curious, and never stop learning. With dedication and attention to detail, you can produce halftone screen prints that stand out in the competitive world of textile design and production.
By following this comprehensive guide and continually honing your skills, you’ll be well-equipped to create high-quality halftone screen prints that captivate your audience and meet the demands of the ever-evolving textile market. Embrace the art and science of halftone screen printing, and watch as your designs come to life with stunning detail and depth.
How to Create Halftone Screen Printing
Halftone screen printing is a vital technique in the world of screen printing, enabling artists to reproduce intricate designs and images with remarkable detail. This comprehensive guide will explore how to effectively create halftones for screen printing, covering essential concepts, tools, and techniques.
What Are Halftones?
Halftones are mathematical patterns of dots used to represent varying grayscale values of an image. By manipulating the size and spacing of these dots, printers can create the illusion of depth and tonal variation. The halftone process converts a continuous-tone image, like a photograph, into a series of dots that can be easily printed on fabric.
As defined by the Getty Center, “A representation of a continuous-tone image is, in fact, an optical illusion based on the limited optical resolution of the human eye.” When viewed from a standard distance, the tiny halftone dots blend together, appearing as smooth shades of gray or color.
Why Use Halftones in Screen Printing?
Halftone screen printing are particularly valuable for screen printing because they allow for the reproduction of detailed images without the need for multiple screens. By using halftones, printers can achieve shading and gradients, making it possible to create complex designs that would be challenging to reproduce with flat colors alone. This technique is especially useful in the textile industry, where vibrant, multi-tonal prints are often required.
Moreover, halftones enable cost-effective printing. Instead of using several screens for different colors, printers can utilize a single screen with halftone dots to achieve the desired effect. This not only saves time but also reduces the amount of materials used, making the process more sustainable.
How to Create Halftones for Screen Printing
Creating halftones for screen printing requires specific software and an understanding of key concepts. Here’s a step-by-step guide on how to get started.
1. Choose the Right Software
To create halftones, you’ll need Raster Image Processing (RIP) software or similar graphic design programs. RIP software is designed specifically for screen printing, automating the halftone creation process and ensuring accuracy.
While Adobe Photoshop can also be used to convert images to halftone for screen printing, it may involve a more manual approach and be time-consuming. Using RIP software streamlines the process and yields better results. Some popular RIP software options include AccuRIP, Wasatch, and UltraRIP, each offering unique features suited for different printing needs.
2. Understanding Key Terms
Before diving into halftone creation, familiarize yourself with essential terms:
- Lines Per Inch (LPI): This refers to the number of halftone lines within one inch. A higher LPI results in finer dots and more detail, while a lower LPI produces larger dots. For example, an LPI of 50 will yield larger dots than an LPI of 200.
- Dots Per Inch (DPI): DPI measures the resolution of an image. Higher DPI values correlate with greater detail. Understanding the relationship between DPI and LPI is crucial for producing high-quality prints.
- Angle: The angle at which halftone dots are printed can affect the overall image quality. Dots that fall at right angles to the screen mesh can create moiré patterns, which are undesirable.
- Dot Shape: Halftone dots can take various shapes, including round, square, and elliptical, impacting the final print’s appearance. Round dots are the most common, but experimenting with different shapes can lead to unique effects.
- Dot Gain: This phenomenon occurs when halftone dots expand during printing, resulting in darker areas than intended. Understanding and compensating for dot gain is crucial for achieving accurate prints.
3. Set Up Your Design
When preparing your image for halftone screen printing, follow these steps:
- Choose Your Image: Select a high-contrast image that you want to convert into halftone. Images with distinct light and dark areas work best, as they allow for more effective dot placement.
- Determine the Appropriate LPI: Based on your screen mesh count, decide on the LPI that will work best for your design. For example, if you’re using a 160 mesh screen, dividing by 5 gives you an ideal LPI of 32. For higher detail, you might aim for 40 LPI by dividing by 4.
4. Convert the Image to Halftone
Using your chosen software, convert your image to halftone. Here’s a simplified process using RIP software for halftone screen printing:
- Import Your Image: Load your image into the RIP software.
- Adjust Settings: Configure the settings for LPI, angle, and dot shape. Remember that dots should be positioned to avoid the threads of the mesh screen.
- Preview the Halftone: Most RIP software allows you to preview the halftone pattern. This step is crucial for making any necessary adjustments to ensure the desired effect.
- Print the Films: Once you’re satisfied with the halftone settings, print the films for exposure on the screen. Be sure to use high-quality film for the best results.
5. Printing Halftones on Fabric
Once your screens are prepared, it’s time to start the actual halftone screen printing process:
- Set Up Your Screen: Ensure your screen is correctly aligned and secured. A well-prepared screen can make a significant difference in the print quality.
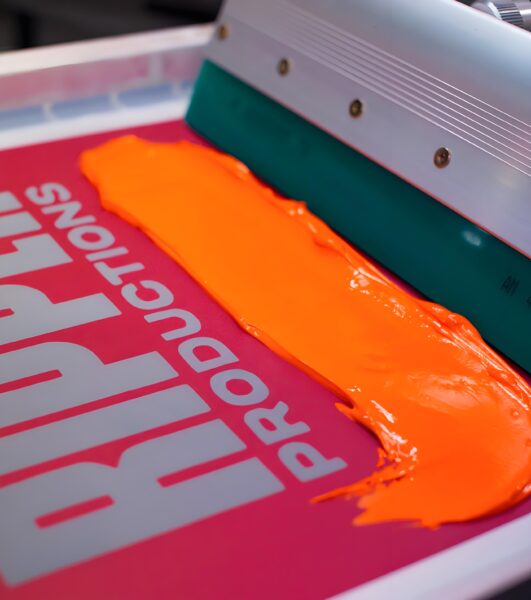
- Choose the Right Ink: Select plastisol ink or another suitable ink for your fabric type. Be mindful of the viscosity and drying time, as this can affect the final print quality.
- Print with Care: When printing halftones, apply consistent pressure with the squeegee to avoid issues like dot gain. It’s essential to maintain an even stroke to ensure all halftone dots are properly transferred.
6. Fine-Tuning Your Prints
After halftone screen printing, it’s crucial to evaluate your results. Here are some tips for achieving the best halftone prints:
- Check for Consistency: Examine your prints for consistent dot placement and density. Any inconsistencies can result in a flawed final product.
- Adjust for Dot Gain: If you notice that your prints appear darker than expected, consider adjusting your halftone settings to compensate for dot gain. This may involve reducing the LPI or altering the ink viscosity.
- Conduct Test Prints: Always perform test prints before running a full batch. This practice allows you to identify any issues and make necessary adjustments without wasting materials.
Tips for Successful Halftone Screen Printing
- Experiment with Angles: For the best results, use angles around 22.5 degrees to prevent alignment issues with the mesh. Avoid angles like 0°, 90°, or 45°, which can create complications during printing.
- Monitor Dot Gain: Keep an eye on dot gain during the printing process. Understanding how your specific ink and screen setup interacts will help you adjust accordingly.
- Use Quality Mesh Screens: The choice of mesh screen can significantly impact the final outcome. Higher mesh counts can lead to finer details, while lower counts are better for bold designs.
- Train Your Team: Ensure everyone involved in the printing process understands the fundamentals of halftones. Proper training can enhance the overall quality of your prints.
Advanced Techniques for Halftone Screen Printing
As you become more comfortable with basic halftone screen printing, consider exploring these advanced techniques:
Multi-Color Halftones
While single-color halftones can produce impressive results, multi-color halftones can take your designs to the next level. This technique involves using multiple screens, each with its own halftone pattern, to create full-color images. When printing multi-color halftones:
- Separate your image into individual color channels (typically CMYK).
- Create a halftone pattern for each color channel, using different angles to avoid moiré patterns.
- Print each color separately, ensuring precise registration between layers.
Frequency Modulated (FM) Halftones
FM halftones, also known as stochastic screening, use randomly placed dots of the same size instead of varying dot sizes. This technique can produce sharper images with smoother gradients and is particularly useful for detailed designs. However, FM halftones require higher mesh counts and more precise control over the printing process.
Hybrid Halftones
Hybrid halftones combine traditional amplitude modulated (AM) halftones with FM halftones. This technique uses larger AM dots for midtones and shadows, while employing smaller FM dots for highlights. Hybrid halftones can offer the best of both worlds, providing smooth gradients and fine details.
Troubleshooting Common Halftone Issues
Even experienced printers may encounter issues with halftone printing. Here are some common problems and their solutions:
Moiré Patterns
Moiré patterns are unwanted interference patterns that can occur when halftone dots conflict with the mesh of the screen.
Solution: Adjust the angle of your halftone pattern. Try using angles that are not multiples of 15 degrees (e.g., 22.5°, 67.5°).
Loss of Detail in Highlights or Shadows
If you’re losing detail in the lightest or darkest areas of your print, it may be due to improper exposure or ink issues.
Solution: For highlights, try reducing your exposure time slightly. For shadows, ensure your ink isn’t too thick and consider using a higher mesh count screen.
Inconsistent Dot Reproduction
If your halftone dots aren’t printing consistently across the design, it could be due to uneven screen tension or improper off-contact.
Solution: Check your screen tension and ensure it’s consistent across the entire screen. Adjust your off-contact to maintain a small gap between the screen and the substrate throughout the print stroke.