Conclusion
Mastering the temperature and time settings for 3D silicone heat transfer is key to achieving professional-grade results. By adhering to the recommended guidelines and practicing proper application techniques, you can create vibrant, durable designs on various fabrics. Whether you’re producing branded clothing, promotional items, or custom products, 3D silicone heat transfer offers a versatile and high-quality solution for all your design needs.
What Temperature and Time for Silicone Heat Transfer?
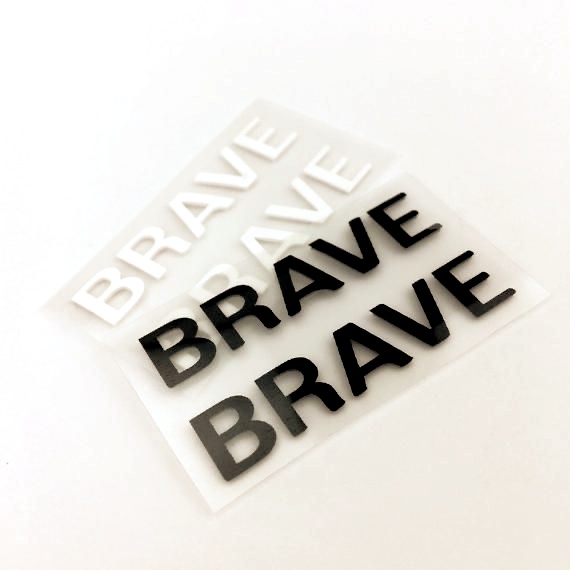
3D silicone heat transfer is an increasingly popular method for applying logos, labels, and designs to various types of clothing and promotional products. Knowing the right temperature and time settings is crucial for achieving high-quality and long-lasting results. In this comprehensive guide, we’ll discuss the optimal temperature and time settings for 3D silicone heat transfer, provide step-by-step instructions for applying silicone transfers, and address common issues and tips for best practices.
What is 3D Silicone Heat Transfer?
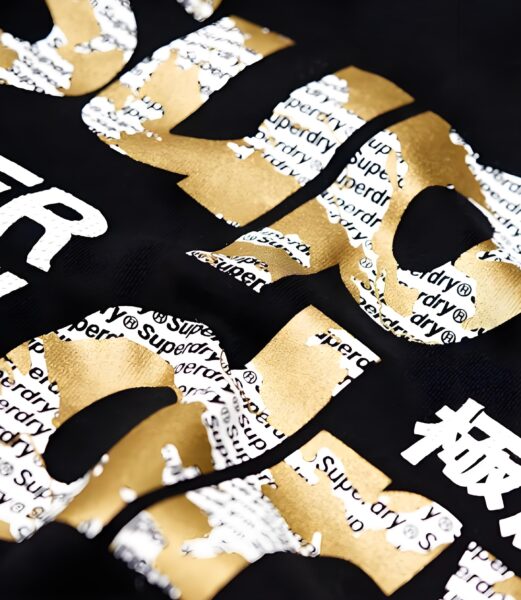
3D silicone heat transfer is a technique that uses silicone-based materials to create three-dimensional designs on garments and other fabrics. This method stands out because of the raised effect it gives to logos and labels, resulting in a unique tactile and visual experience. The silicone material offers flexibility, stretchability, and durability, making it ideal for silicone heat transfer clothing, including sportswear, activewear, and branded promotional products.
Why Use 3D Silicone Heat Transfer?
The benefits of 3D silicone heat transfer include:
- Durability: Silicone heat transfers are known for their ability to withstand numerous washes without cracking, peeling, or fading. This makes them perfect for garments that go through rigorous use.
- Flexibility: Silicone transfers can stretch with the fabric, ensuring that the design remains intact, even on stretchy materials like spandex or polyester blends.
- High-Quality Finish: The raised, 3D effect of silicone transfers gives garments a premium look and feel, enhancing the overall quality and appeal of the final product.
- Customizability: Custom silicone heat transfer allows for various designs, including matte, glossy, and metallic finishes, providing brands with limitless possibilities for their logos and labels.
Key Factors Influencing 3D Silicone Heat Transfer
The success of 3D silicone heat transfer depends on several key factors, including temperature, time, and pressure. These variables must be precisely controlled to ensure the silicone bonds properly to the fabric, creating a durable and vibrant finish. Here’s a closer look at each factor:
1. Temperature
Temperature plays a crucial role in activating the adhesive properties of the silicone and ensuring it bonds effectively with the garment. Typically, 3D silicone heat transfer requires a temperature range between 300°F to 330°F (approximately 150°C to 165°C). The exact temperature may vary depending on the type of fabric, the thickness of the silicone design, and the equipment used.
2. Time
The amount of time the heat is applied is equally important. Generally, the application time for silicone heat transfer is around 10 to 15 seconds. This duration allows the silicone to bond securely to the fabric without scorching or damaging it.
3. Pressure
Applying the right pressure is essential for ensuring even contact between the silicone transfer and the fabric. A medium pressure setting (approximately 40-60 psi) is usually recommended. Insufficient pressure may result in poor adhesion, while excessive pressure could flatten the 3D effect.
Optimal Temperature and Time Settings for 3D Silicone Heat Transfer
Recommended Temperature Ranges
The ideal temperature for 3D silicone heat transfer depends on the type of fabric being used. Here’s a general guide for common materials:
- Cotton: 320°F (160°C)
- Polyester: 310°F (155°C)
- Blends (Cotton/Polyester): 315°F (157°C)
- Spandex/Elastane: 305°F (150°C)
Recommended Time Settings
The application time for heat transfer on silicone generally ranges from 10 to 15 seconds. The exact time can vary based on the fabric and the complexity of the design. Below are recommended time settings for various fabric types:
- Cotton: 15 seconds
- Polyester: 12 seconds
- Blends: 13 seconds
- Spandex/Elastane: 10 seconds
Step-by-Step Guide to 3D Silicone Heat Transfer
Here’s a detailed process to achieve the best results with your 3D silicone heat transfer:
Step 1: Preparing the Design
Start by preparing your design, logo, or label using silicone inks. 3D silicone rubber heat transfer designs are created with silicone inks that are cured to form a solid, three-dimensional label. For custom designs, ensure that the edges are smooth and well-defined to achieve a crisp finish.
Step 2: Preheat the Heat Press
Set your silicone heat transfer label machine to the recommended temperature for the type of fabric you’re using. Allow the machine to fully preheat before proceeding. This step is crucial to ensure even heat distribution during the transfer process.
Step 3: Position the Transfer
Place the 3D silicone heat transfer label onto the garment. Use heat transfer silicone paper to cover the design if needed, as this helps protect the transfer during pressing. Make sure the transfer is correctly positioned and aligned to avoid any misprints.
Step 4: Apply Heat and Pressure
Once the transfer is in place, close the heat press and apply the recommended pressure. Press for the designated time based on the fabric type (generally between 10-15 seconds). This step activates the adhesive properties of the silicone, bonding it to the fabric.
Step 5: Peel the Transfer
After the heat press cycle is complete, open the press and carefully peel away the heat transfer silicone sheet while it is still warm. This reveals the final silicone heat transfer logo adhered to the garment. Allow the fabric to cool completely before handling.
Common Issues and Troubleshooting
Even with the correct temperature and time settings, some issues may arise during the 3D silicone heat transfer process. Here are common problems and how to address them:
1. Peeling or Lifting
If the silicone heat transfer starts to peel or lift after application, this may indicate insufficient heat or pressure during the transfer process. To fix this, try increasing the temperature by 5-10°F and apply more pressure during the next application.
2. Scorch Marks
If scorch marks appear on the fabric, the temperature may be too high. Lower the heat setting by 5-10°F and test on a sample fabric before proceeding with the final product. Also, ensure that you are not applying excessive pressure, as this can contribute to scorching.
3. Poor Adhesion
If the silicone design does not adhere correctly, it could be due to using the wrong fabric type. Ensure that the fabric is compatible with silicone heat transfer. Materials like cotton, polyester, and blends work best. For other fabrics, such as nylon or spandex, consider using a specially formulated heat transfer silicone label.
4. Flattened 3D Effect
If the three-dimensional effect of the silicone transfer is flattened, the pressure applied during the heat press might be too high. Reduce the pressure slightly and ensure that the press evenly distributes heat across the design.
Tips for Perfecting 3D Silicone Heat Transfer
Achieving perfect results with 3D silicone heat transfer requires a combination of the right settings, high-quality materials, and proper application techniques. Here are some additional tips to enhance your transfer process:
1. Use High-Quality Silicone Transfer Materials
Invest in quality heat transfer silicone labels and papers designed specifically for 3D silicone heat transfer. High-quality materials not only improve the final appearance of the design but also ensure a longer-lasting bond with the fabric.
2. Conduct Test Prints
Before starting a full production run, conduct test prints on sample fabrics. This allows you to adjust the temperature, time, and pressure settings to achieve the best results.
3. Pre-Treat the Fabric
For fabrics prone to shrinking or wrinkling, consider pre-pressing them for a few seconds. This step smooths out the surface and removes any moisture, improving the adhesion of the silicone transfer.
4. Maintain Your Heat Press
Regularly inspect and maintain your silicone heat transfer label machine to ensure consistent heat and pressure distribution. An uneven heat press can result in inconsistent transfer quality, affecting the durability of the final product.
5. Store Transfers Properly
Proper storage of custom silicone heat transfer designs is essential. Keep them in a cool, dry place, away from direct sunlight and extreme temperatures, to prevent any degradation of adhesive properties.
Applications of 3D Silicone Heat Transfer
3D silicone heat transfer is versatile and can be used across various industries for different applications:
1. Clothing and Apparel
Silicone heat transfer clothing is a popular choice for sportswear, activewear, and casual clothing brands. The 3D effect adds a luxurious touch to logos and labels, enhancing the garment’s overall aesthetic.
2. Promotional Products
Silicone heat transfer logos can be applied to promotional items like tote bags, caps, and accessories. The durable nature of silicone transfers ensures the design remains vibrant and intact, even with frequent use.
3. Custom Branding
For businesses looking to create a unique brand identity, custom silicone heat transfer offers endless possibilities. From bold 3D logos to detailed labels, this method allows brands to showcase their designs in a high-quality format that stands out.

