Table of Contents
Ultimate Guide to White Plastisol Ink: Cure Techniques for Screen Printing
Welcome to this guide on white plastisol ink. We will show you how to cure it well for screen printing. This guide is easy to read. It has short words and small sentences. You will learn how to cure your ink to make prints that last. We use cure temperature, flash curing, undercured ink, conveyor dryer, low-bleed ink, and crock test is essential for assessing ink deposit durability.
In this guide, we have lists and a table. They help you learn fast. Let’s start!
1. Introduction
Screen printing is fun. It is a way to put designs on clothes. White plastisol ink gives bright prints. But if you do not cure the ink well, the print will not last. You can see problems. Some prints fade. Some prints chip and crack. In our guide, we tell you the best cure techniques. We also give data from real studies that help you do a great job.
Good printing starts with the right cure. You must heat the ink to exactly the right cure temperature. This guide shows you how to set your machines. You will learn about a conveyor dryer and other tools. We give steps to help you cure ink. Our goal is to help you fix problems like undercured ink and overcured ink. Follow along to make your work strong and bright.
2. What is White Plastisol Ink?
White plastisol ink is a type of ink for screen printing. It has many good traits. Here are some simple facts:
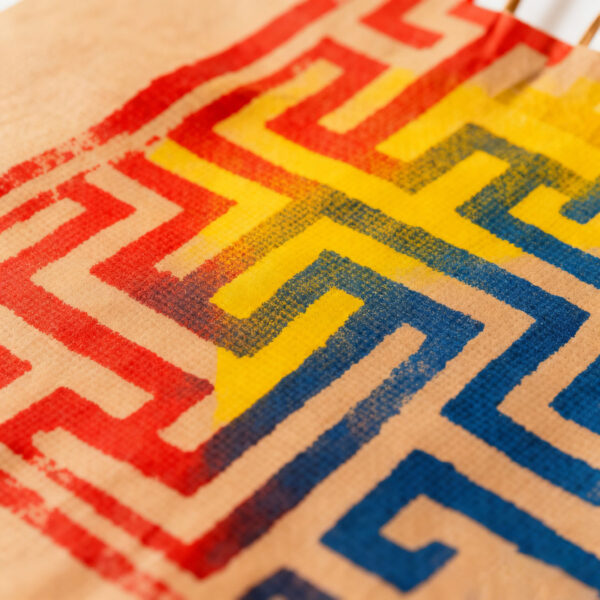
- Bright and Opaque: The ink is white and stands out.
- Thick in Nature: It needs heat to set.
- Good on Many Fabrics: It works on cotton and blends.
- High Titanium Dioxide: low bleed ink can enhance the opacity. This gives it a bright white look but can make curing hard.
3. Why Does Curing Matter?
Curing means heating the ink until it hardens. This step is very key. Here is why:
- Heat Makes Ink Strong: The heat bonds the ink to the fabric.
- Prevents Fading: Good curing makes prints last many washes.
- Stops Cracking: It stops the ink from breaking over time.
- Passes the Crock Test: The cured print must stand many rubs without color transfer. This test is called a cure temp test. crock test.
Studies show that screen printers who cure ink well get prints that do not fade. Curing is a must in the print world.
4. Prep Work: Before You Cure
Before you cure the ink, you must get ready. Here are some steps for preparation:
- Prepare Your Screen:
- Use a good mesh count. For a white underbase, use 110-230 mesh.
- Check the squeegee. It should spread the ink even.
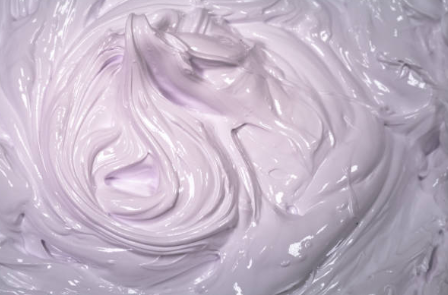
- Mix the Ink Well:
- Make sure the ink is smooth.
- Add a reducer if the ink is too thick.
- Check Your Fabric:
- Dry the garment first. Wet fabrics can change the cure.
- Use low-bleed ink on polyester blends to keep colors bright.
Prepping is the first step to good curing. It helps you print with care and precision.
5. Step-by-Step Cure Techniques
Now, we will show you how to cure the ink in steps. Follow these simple steps to reach the optimal cure temperature.
Step 1: Set the Temperature
- Heat Settings: Heat your dryer to 320°F–330°F (160°C–165°C). This is the right range for white plastisol ink. The cure time is between 60 and 90 seconds[^4], depending on the ink deposit.
- Check with a Thermometer: Use an infrared thermometer. This tool tells you the exact temperature.
- Watch the Time: Do not heat for too long. This helps you avoid low cure issues in your prints. overcuring, which can make prints crack.
Step 2: Choose Your Method
There are different ways to cure ink:
- Conveyor Dryer: A conveyor dryer is a machine with a moving belt. It gives a steady cure. Setting the right temperature and airflow is key.
- Flash Curing: Flash curing helps dry the ink between layers. Use flash curing at 280°F–300°F. This can reduce bleed on dark fabrics by 75%.
- Heat Press: A heat press works for small batches. It is good for home or small shops. However, it may give uneven results in a large job if the cure temp is not monitored.
Step 3: Test the Curing
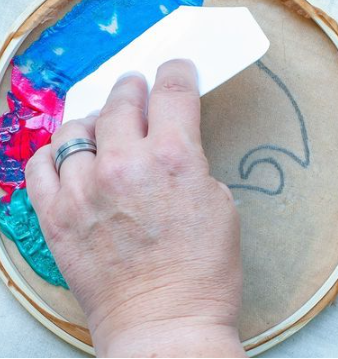
- Use the Donut Test: A donut test helps you check if the ink is cured well. Press a donut shape on the fabric.
- Crock Test: Rub the print. It should pass many rubs as set by ASTM D6488. This is a standard test.
Step 4: Calibrate Your Equipment
- Monthly Checks: Calibrate your dryer every month. Use a thermometer to check hot spots and ensure proper cure temp.
- Follow Best Practices: Tune your machine settings. This step saves your work and avoids mistakes.
Following these steps gives you prints that last long and look bright.
6. Tools and Equipment You Need
Choose good tools to help you cure. You will need:
- Infrared Thermometer: For fast, accurate temperature reading.
- Conveyor Dryer: It can keep the heat even.
- Flash Curing Setup: To cure between print layers.
- Donut Tester: To check the ink cure.
- PPE and Ventilation Setup: Use proper masks and gloves. OSHA rules say this is important for safety.
These tools help you work fast and well.
7. Troubleshooting Common Issues
Even when you follow steps, you may have some issues. Here are ways to fix them:
Problem 1: Undercured Ink
- Signs:
- The ink feels sticky.
- Still wipes off in the wash.
- Fixes:
- Check your temperature. It must be in the 320°F–330°F range.
- Increase the time slightly.
- Use a thermometer to be sure.
Problem 2: Overcured Ink
- Signs: The ink looks cracked or too hard.
- Fixes:
- Do not use heat above 350°F. Overheating can cut ink elasticity by 40%.
- Lower the temperature or reduce the cure time.
- Calibrate your dryer often.
Problem 3: Ink Bleeding
- Signs: The white shows tint from other colors.
- Fixes:
- Use low-bleed ink if you print on dark fabrics.
- Use flash curing on dark designs.
- Print a flash cure underbase before adding more colors.
Problem 4: Loss of Opacity
- Signs: The ink does not look white on dark fabrics.
- Fixes:
- Change the mesh count.
- Try a print-flash-print method. This gives extra coverage.
- Use dual-layer printing with a proper cure between prints.
These fixes can help you get the prints you want. Use them when you see a problem.
8. Advanced Tips for Pros
If you are a pro printer, try these tips:
- Mixing Additives:
- Puff or glitter modifiers can change how the ink sets, especially with white screen printing plastisol ink.
- They need 20–30 extra seconds to cure well.
- Dark Garment Printing:
- Use a double-stroke underbase.
- Add a precise flash cure step.
- Hybrid Inks:
- Try using FN-INK. It cures at 280°F and saves energy by 25%.
- Cost Savings:
- Proper curing can reduce rework. One error can cost you $5–$10 per garment.
These tips help you work with care and save money. They make your print work look neat and last long.
9. Safety and Compliance
Safety is very important when you cure ink. Here are key points:
- Ventilation:
- Use a good vent system. This is required by OSHA.
- It stops the buildup of fumes.
- Wear PPE:
- Always wear gloves and masks.
- Check your work area for safety.
- Waste Disposal:
- Dispose of waste ink safely.
- Follow EPA-approved methods.
Safety comes first. Make sure to follow these tips each time you work.
10. Data and Case Studies
Below is a table with data that guides you on the best curing practices. It shows research and study results. These numbers help you understand why curing is key.
| Data Type | Key Findings/Statistics | Source | Relevance to Cure Techniques |
|---|---|---|---|
| Optimal Cure Parameters | 320°F–330°F (160°C–165°C) for 60–90 seconds cures ink fully. | Wilflex Product Guide (2022) | Gets the balance right so the ink lasts and does not burn. |
| Undercured Ink Defects | 65% of print shops say undercuring is the top reason for print issues. | SGIA Industry Report (2021) | Shows why you must keep the right temperature and time. |
| Overcuring Risks | Heat above 350°F cuts ink elasticity by 40% and makes cracks in the bottom of the ink layer. | Textile Chemistry Journal (2020) | Tells you never to use too much heat. |
| Flash Curing Efficiency | Flash curing at 280°F–300°F cuts bleed on dark prints by 75%. | Rutland Technical Bulletin (2023) | Helps you work better with dark fabrics and multi-layer prints. |
| Low-Bleed Ink Adoption | 80% of printers with low-bleed ink see less dye bleed on polyester blends. | FESPA Survey (2023) | Proves low-bleed ink is a must for synthetic fabrics. |
| Crock Test Compliance | ASTM D6488 requires prints to pass 50+ rubs with no color transfer. | ASTM International | Sets a standard for a strong print that lasts many washes. |
| Productivity Impact | Proper curing raises production speed by 20% as reprints drop. | M&R Case Study (2022) | Links proper curing to work speed and cost savings. |
| Environmental Impact | Using a conveyor dryer with heat recovery reduces energy use by 30% of the time, low bleed ink may be required for optimal results. over manual curing. | Green Printing Initiative (2021) | Letting you work green saves energy and money. |
| Safety Compliance | OSHA notes that 12% of screen printing injuries come from bad ventilation in curing. | OSHA Guidelines (2020) | Stresses the need for safety gear and proper equipment. |
| Case Study: Small Shop | One small shop cut defects by 90% after they calibrated their dryer with infrared tools. | Impressions Magazine (2022) | Shows that careful monitoring saves work and money. |
| Innovation: Hybrid Inks | FN-INK (a hybrid plastisol) cures at 280°F, cutting energy costs by 25%. | FN-INK Whitepaper (2023) | Offers a new way to reduce heat needs and energy cost. |
| Cost of Poor Curing | Curing mistakes cost about $5–$10 per garment in rework due to improper cure temp settings. | NAPIM Survey (2021) highlights the importance of cure temp in printing. | Reminds you that curing right saves dollars. |
| Substrate-Specific Data | 50/50 cotton-poly blends need 10–15% longer cure time to avoid undercuring. | Gildan Fabric Guidelines (2023) | Shows that fabric types may need extra cure time. |
| Additive Impact | Puff additives need 20–30 extra seconds of cure time to avoid scorching. | Union Ink Technical Sheet (2022) | Helps guide the use of additives safely. |
| Washability Stats | When cured well, ink keeps 95% opacity after 50+ washes. | AATCC Test Method 135 (2022) | Proves that good curing improves wear and wash life. |
The table above gives you fast facts. Use these numbers to check your work. They tell you why each step is important. Data from leading brands, surveys, and studies help you work smart.
11. Final Words and Next Steps
You now know how to cure white plastisol ink. Use these tips to make prints that last a long time. Follow the guide step by step. Use the right temperature and time. Test often. And be safe.
Here is a quick list of steps you can follow every time:
- Mix Your Ink Well: Make it smooth.
- Prep Your Screen and Fabric: Use the right mesh count and pre-dry garments.
- Set Your Dryer: Aim for 320°F–330°F for 60–90 seconds.
- Test Your Curing: Do a donut test and a low bleed test. crock test.
- Troubleshoot Problems: Fix undercured ink, overcuring, or ink bleeding fast.
- Use Smart Tools: An infrared thermometer, conveyor dryer, and flash curing set-ups help you work well.
- Follow Safety Rules: Wear PPE, use good ventilation, and follow OSHA guidelines.
Learning these steps helps you work fast, safe, and with good results. When you use the proper cure techniques, your screen prints look bright and stay strong. You can print on many fabrics and save money because you need fewer reprints.
Each time you work, set your equipment right. Make your temperature, time, and machine settings clear. This gives you a good print that makes your work shine. Remember, every good print starts with good curing.
With these tips and tricks, you can now join many successful print shops.
You have tools, you have data, and you have ideas. With careful work, you can reach the best cure temperature. Follow our steps and tips. Your prints will pass the crock test and stay bright after many washes. By using air recovery systems and safe work methods, you also help the earth. Print smart and green!
Be sure to check your machine settings every month. A small check with an infrared thermometer can save many problems. Use a conveyor dryer with heat recovery if you can. This switch may save up to 30% energy. The numbers in our table help you see the benefits. Better curing means faster production and lower costs at work.
As you gain more practice, use advanced techniques. Try flash curing between layers. This method is great on dark garments. It stops color bleed and keeps edges clean. Use a double-stroke underbase if needed. These techniques make your print pop!
Finally, do not forget safety. Always follow local and OSHA guidelines. Work in a well-ventilated space. Use gloves and masks to protect your skin and lungs. Your work is important, especially when using white ink for high-quality prints. Taking safety steps means you can work longer and with more care.
This guide is made for printers who want to learn step by step about screen printing plastisol techniques. We have used simple words and clear steps. Use our lists, our table, and our tips next time you work. Good printing is not by chance. It is by care, data, and attention to details. Enjoy screen printing, and let your art shine on every garment.