Screen Printed Cotton Fabric——Cotton Ink Silk Screen Printing Guide

This is an economical choice with yarn fibers bonded perpendicular to the fiber bundles. The fabric is fluffy, fuzzy, and has an uneven weave. It is the most difficult to achieve a high-quality screen print on this fabric. Due to the roughness of the fabric, use cotton ink to printing takes a lot of effort to achieve a smooth print.
Screen Printed Cotton Fabric: Cotton Ink Silk Screen Printing Guide
Screen printing on cotton is a popular method because it is so versatile and produces great results. This guide will help you understand the entire process from preparation to curing for ink on cotton applications.
Preparation
- Material preparation:Ensure that all materials, including fabrics, inks, scrapers, screens, curing equipment, etc., are neatly arranged in the work area for easy operation. Pay particular attention to your cotton ink selection.
- Fabric placement:Stretch the cotton fabric flat to ensure there are no wrinkles and secure it to the printing table to ensure an even printing effect when applying ink and cotton.
- Screen preparation:Make sure the screen is clean and free of any old residual ink. Choose the appropriate number of grids according to the design and printing effect requirements to ensure high accuracy and clarity.
Cotton Ink Screen Printing Operation Process
Bottom printing (first step)
- Ink preparation:Select transparent Plastisol ink and pour an appropriate amount of ink into the ink groove of the stencil according to the size of the fabric and the design area.
- Screen printing:Use a rubber scraper to evenly apply the clear ink on cotton fabric. Push and pull the scraper evenly at a 45-degree angle to ensure that the ink cotton passes through the stencil and covers the design area.
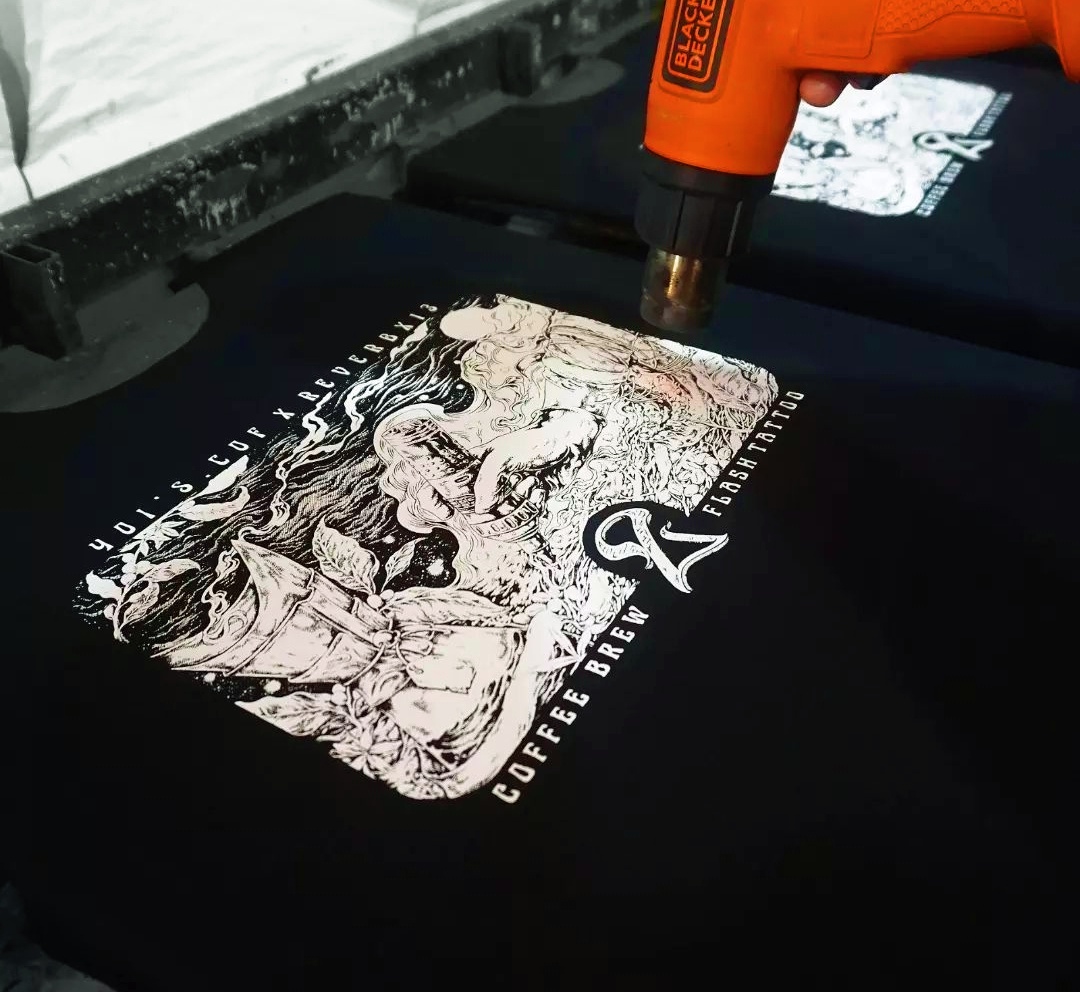
- Primer curing:After printing, the fabric needs to be sent to a drying device (such as a conveyor belt dryer or drying box) for preliminary curing. Usually, the temperature should be set at 160°C, and the curing time depends on the thickness of the ink, generally between 60 seconds and 90 seconds, to ensure that the bottom layer is completely dry.
High-density printing (second step)
- Mixing preparation:Add HF-1601 additive to high-density Plastisol ink and stir evenly. HF-1601 can enhance the three-dimensional effect of the ink and make the pattern more high-density and three-dimensional.
- High density screen printing:Pour the mixed cotton ink evenly into the ink tank of the screen, and use a rubber scraper to print the high-density cotton ink onto the design pattern. Due to the need for high-density effects, you can scrape and print multiple times to increase the ink thickness and enhance the three-dimensional effect.
- Re-curing: After high-density printing is completed, the fabric is placed in a drying device for final curing. Usually, the temperature should be maintained at 170°C for 90 seconds to 120 seconds to ensure that the cotton ink is completely dry and achieves the best three-dimensional effect.
Quality Inspection and Closing
- Quality Check:After taking the fabric out of the drying equipment, check the printing quality of the pattern to confirm whether there are any problems such as missing printing, fading, or uneven color.
- Modification:If there are a few areas that do not achieve the desired effect, they can be appropriately repaired locally and dried again.
- Storage:When finished, place the printed fabric in a cool and ventilated place to ensure the best effect after the pattern is completely dry.
High-Density Printing Process
- Thick plate printing is characterized by a specific thickness of the printed material, which can be pre-adjusted to a specific three-dimensional effect.
Precautions
- Test Print:Always do a test print on scrap fabric to adjust color and technique when working with ink and cotton.
- Accurate registration:Ensure precise registration when printing multi-color designs.
- Store:Store finished products properly to prevent cotton ink from smudging or fading.

Common Issues in Silk Screen Printing on Cotton
Silk screen printing on cotton fabrics, while generally straightforward, still presents some common issues that can affect print quality and durability. Here’s a breakdown of typical problems in silk screen printing on cotton
Ink Bleeding:
- Cotton’s absorbent nature can cause ink bleeding, where the ink spreads beyond the intended print area, making the edges appear blurry.
- This issue is often exacerbated by low-quality or overly thin inks. High-viscosity inks and optimized drying times can help reduce bleeding on cotton fabrics.
Inconsistent Ink Coverage:
- Cotton fibers are more textured than synthetic materials, which can lead to uneven ink coverage, especially with low-opacity inks.
- Using high-opacity inks, applying an underbase layer, or doing multiple passes can improve coverage and ensure vibrant colors on darker cotton fabrics.
Fibrillation:
- Fibrillation occurs when tiny cotton fibers break through the ink layer, creating a fuzzy or rough texture on the print after washing.
- Fibrillation is more noticeable on lighter prints and can be minimized with proper ink curing, applying a second layer, or using a flattening screen for smoother results.
Ink Cracking and Fading:
- Cotton fabrics are prone to ink cracking and fading over time, especially if the ink isn’t cured properly or if rigid inks are used.
- To prevent cracking, it’s essential to use flexible inks, follow curing guidelines closely, and avoid under- or over-curing, which can lead to poor adhesion and longevity.
Curing Temperature Sensitivity:
- While cotton is more heat-resistant than synthetic materials, improper curing temperatures can still affect print quality. If the curing temperature is too low, the ink won’t bond well; if it’s too high, the fabric can scorch or shrink.
- Consistently monitoring curing temperatures and times for each print run is key to achieving optimal results.
Ghosting (Dye Migration):
- When printing on cotton blends, especially those with polyester, dye migration can occur, where dyes from the fabric bleed into the ink and alter its color over time.
- Using migration-blocking additives or a barrier underbase layer can help prevent ghosting and preserve the print’s original color.
Difficulty with Fine Details:
- Cotton’s texture can make it difficult to achieve sharp, detailed prints, especially on high-thread-count fabrics.
- Using a finer mesh screen and inks formulated for high detail can enhance clarity, but it’s important to test and adjust settings to match the fabric’s specific texture.
Inadequate Wash Fastness:
- Poor wash fastness is a common issue if the ink or curing process isn’t suited for cotton. This can cause fading or washing away of the print after a few washes.
- To improve wash durability, it’s crucial to ensure inks are fully cured and compatible with cotton, along with recommending customers follow specific care instructions, like washing inside out with mild detergents.
Lint and Dust Issues:
- Cotton fabric can attract lint and dust, which may interfere with printing, causing blemishes or uneven ink deposits.
- Prepping the fabric by removing any lint and using a clean work environment helps maintain print quality and consistency.
These issues highlight the need for choosing the right ink formulations, optimizing curing settings, and making adjustments for cotton’s specific characteristics to achieve consistent, high-quality results in screen printing.

Solutions for Enhancing Ink on Cotton
When screen printing with Plastisol ink on cotton fabric, the following methods can be employed to address common issues and enhance printing effects and durability
Prevent Ink Penetration
- Use High-Viscosity Plastisol Ink: The high viscosity of Plastisol ink is suitable for creating clear patterns on cotton fabric, preventing ink penetration and edge blurring.
- Control Ink Layer Thickness: When printing on cotton fabric, use appropriate squeegee pressure to ensure an even ink layer that does not excessively penetrate the fabric fibers.
Improve Ink Coverage
- Use High-Opacity Plastisol Ink: Plastisol ink has excellent coverage, performing particularly well on dark cotton fabrics to ensure vibrant and saturated colors.
- Use a White Base Layer: For dark fabrics, print a white base layer first, followed by colored inks to effectively enhance color brightness and consistency.
Reduce Fiber Fraying
- Increase Anti-Fray Treatment: Before printing, use heat pressing or interleaving paper to smooth the fabric surface and reduce the appearance of fibers, maintaining the smoothness of the print.
- Multi-Layer Printing: If necessary, use two passes of printing to create a thicker ink layer, further reducing post-print fraying issues.
Avoid Cracking and Fading
- Precise Curing Temperature and Time: The curing temperature and time for Plastisol ink are crucial, typically recommended to cure at 160°C (320°F) for 1-2 minutes. Maintaining the correct temperature and time ensures the ink adheres firmly to the cotton fabric, preventing cracking and fading after washing.
- Choose Moderately Flexible Plastisol Ink: Using Plastisol ink with some elasticity can better adapt to the flexibility of cotton fabric, avoiding cracks caused by fabric stretching.
Address Curing Temperature Sensitivity
- Use Low-Temperature Curing Ink: For some cotton-blend fabrics, opt for low-temperature curing Plastisol ink to minimize shrinkage or damage to the fabric due to overheating.
- Control Drying Environment: Ensure the printed fabric cures in a stable environment with no wind and consistent temperature to avoid uneven curing due to temperature fluctuations.
Prevent Ghosting (Dye Migration)
- Use Migration-Blocking Additives: Use Migration-Blocking ink: Incorporate migration-blocking, such as HF-8502, into Plastisol ink, used at the bottom or in the middle