Conclusion
Mastering how to do puff print and controlling the height of your prints requires a balance of art and science. From selecting the right puff additive and mesh count to making thoughtful design choices and fine-tuning the curing process, each step plays a critical role in the final outcome.
By applying these techniques and understanding the factors that influence puff height, you can create stunning, textured designs that stand out. Whether you’re printing for fashion, promotional items, or custom apparel, perfecting your puff printing skills will allow you to produce high-quality, eye-catching products that your customers will love. Understanding how to do puff print properly ensures consistent, impressive results every time.
How to Do Puff Print & Control the Height
How to do puff print is a frequently asked question among screen printers who are looking to add texture and dimension to their designs. Puff printing is a popular technique in the screen printing world, known for its ability to add a three-dimensional effect to fabric. However, mastering how to do puff print and controlling the height of the puff can be challenging. In this guide, we’ll walk you through the process of how to do puff print effectively and provide tips on controlling the puff’s height to achieve the best results.
Controlling Your Puff
Controlling the height of your puff prints is crucial to achieving the desired effect. Whether you’re aiming for a subtle raise or a bold, three-dimensional design, several factors influence the final outcome. These factors include the type of puff additive used, the mesh count of your screen, the design itself, and the curing process. Learning how to do puff print with precision involves understanding these factors and how they interact.
The height of your puff print is determined by the amount of puff additive mixed into your ink, the mesh count of the screen, and the curing temperature. By carefully managing these variables, you can control how much the ink expands, allowing you to create everything from slight textures to prominent, raised designs. Understanding how to do puff print properly is the first step towards achieving the perfect puff height.
1. Puff Additive
The first step in learning how to do puff print involves understanding the role of the puff additive. Puff additive is a special chemical mixed into screen printing plastisol ink that causes the ink to expand when exposed to heat. The amount of puff additive you use directly affects the height of the puff.
Using Puff Additive:
- Proportion: Start by adding the puff additive to your plastisol ink. A common ratio is 10-15% puff additive to ink, but this can be adjusted depending on the desired puff height.
- Mixing: Ensure that the additive is thoroughly mixed with the ink to avoid inconsistencies in the puff height. An uneven mix can lead to areas of the design puffing up more than others, resulting in a patchy appearance. Knowing how to do puff print correctly with the right additive mix is crucial for a consistent result.
- Testing: It’s essential to run tests before full production to see how the ink puffs and adjust the additive concentration if needed.
By carefully controlling the amount of puff additive, you can fine-tune the height of your puff prints, achieving the exact level of texture and dimension you desire. Mastering how to do puff print with the correct puff additive will ensure your designs stand out.
Mesh Count
The mesh count of your screen is another critical factor in controlling the height of your puff prints. Mesh count refers to the number of threads per inch in the screen, and it plays a significant role in determining how much ink is deposited on the garment. Understanding how to do puff print effectively includes knowing how to choose the right mesh count.
Understanding Mesh Count:
- Low Mesh Count (60-110): A lower mesh count allows more ink to pass through the screen, resulting in a thicker ink deposit. This is ideal for designs where you want a higher puff, as more ink will expand when heated. Learning how to do puff print with a low mesh count can lead to more dramatic puff effects.
- High Mesh Count (156-230): A higher mesh count deposits less ink, leading to a finer, more detailed print with less puff. This is suitable for designs that require subtle texture rather than a pronounced raise.
Choosing the Right Mesh:
- For bold, raised puff prints, use a lower mesh count screen. This allows for more ink to be applied, which will puff up more during the curing process.
- For finer, more detailed designs with a subtle puff effect, opt for a higher mesh count. This will deposit less ink, resulting in a lower puff.
By selecting the appropriate mesh count, you can control the amount of ink applied and, consequently, the height of the puff in your puff printing projects. Mastering how to do puff print with the right mesh count is key to achieving the perfect puff.
Design Cholce
Your design plays a significant role in how well your puff prints turn out. Some designs are better suited for puff printing than others, and making the right design choices can help you achieve a more controlled and aesthetically pleasing result. Knowing how to do puff print involves understanding which designs will work best with this technique.
Design Tips for Puff Printing:
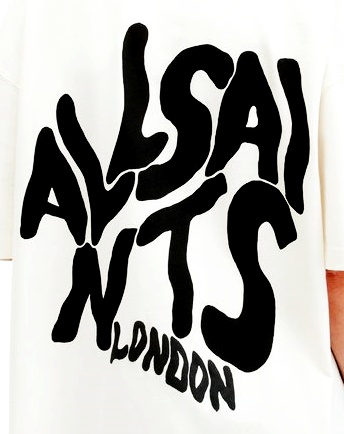
- Simple, Bold Designs: Puff printing works best with simple, bold designs that allow the puff effect to be fully appreciated. Intricate details might get lost in the puff, so it’s better to stick with larger, more defined shapes. This is an important aspect of learning how to do puff print effectively.
- Consideration of Line Thickness: When designing for puff print, consider the thickness of your lines. Thicker lines will puff more, creating a more pronounced three-dimensional effect.
- Negative Space: Use negative space effectively. The contrast between puffed and flat areas can enhance the overall impact of the design.
Adjusting Designs:
- Scaling: Adjust your design size if necessary to accommodate the puff effect. If your design includes fine details, consider enlarging these elements to ensure they remain visible after puffing.
- Experimenting with Layers: Experiment with layering different elements of your design. For example, combining puff print with standard screen printing can create a dynamic, multi-layered look.
Choosing the right design for puff printing is crucial to achieving a controlled and visually appealing result. Focus on bold, simple shapes that showcase the puff effect, and avoid overly detailed designs that may not translate well. Mastering how to do puff print also means knowing how to design for it.
Bonus Tip: Curing Your Puff
Curing is a critical step in the puff printing process, as it activates the puff additive and causes the ink to expand. Proper curing ensures that your puff print reaches the desired height and that the ink adheres well to the fabric. Understanding how to do puff print also means mastering the curing process.
Curing Process:
- Temperature: The curing temperature is crucial for controlling the puff height. Most puff additives activate at around 320°F (160°C). However, slight variations in temperature can affect how much the ink puffs. For a higher puff, consider slightly increasing the temperature, but be cautious not to overheat, as this can cause the ink to scorch or over-expand. Learning how to do puff print with the right curing temperature is essential.
- Time: The duration of curing also impacts the puff effect. A longer curing time allows more heat to penetrate the ink, potentially increasing the puff height. However, too much time can lead to over-curing, where the ink may crack or lose its elasticity.
- Testing and Adjustment: Always conduct tests to determine the optimal curing time and temperature for your specific ink and puff additive combination. This will help you achieve consistent results.
By carefully controlling the curing process, you can fine-tune the height of your puff prints, ensuring that each design meets your exact specifications. Mastering how to do puff print involves understanding how curing affects the final result.
Use an Underbase
Using an underbase is a common technique in screen printing, and it can be particularly beneficial when working with puff prints. An underbase is a layer of ink, usually white or a similar light color, that is printed beneath the main design. This base layer helps to make the top colors more vibrant and can also affect the puff height. Knowing how to do puff print effectively can be enhanced by using an underbase.
Benefits of an Underbase:
- Enhanced Visibility: An underbase can make your puff print design more visible, especially on dark garments. The underbase provides a solid foundation, allowing the puff print to stand out more clearly.
- Control Over Puff Height: By adding an underbase, you can control the puff height more precisely. The underbase ink acts as a buffer, ensuring that the puff print ink doesn’t sink into the fabric, which could reduce the puff effect.
- Improved Durability: An underbase can also improve the durability of your puff print by providing a stable layer that helps the puff ink adhere better to the fabric.
Applying an Underbase:
- Screen Setup: Prepare a screen specifically for the underbase layer, ensuring it aligns perfectly with the puff print design.
- Ink Application: Print the underbase layer first, cure it, and then apply the puff print ink on top.
- Testing: As always, testing is key. Make sure to test how the underbase affects the puff height and adjust accordingly.
Using an underbase can enhance both the visual and structural qualities of your puff prints, making it a valuable technique in your printing toolkit. Knowing how to do puff print with an underbase can greatly improve your results.
Compare and Contrast

When it comes to puff printing, it’s important to understand how different factors compare and contrast in their impact on the final result. Whether it’s the choice of puff additive, mesh count, or the curing process, each decision influences the height and quality of your puff prints. Learning how to do puff print involves understanding these comparisons.
Puff Additive vs. Mesh Count:
- Puff Additive: Directly affects how much the ink will expand. More additive generally means a higher puff.
- Mesh Count: Controls the amount of ink applied. A lower mesh count allows for more ink, which can result in a higher puff, especially when combined with a generous amount of puff additive.
Curing vs. Design Choice:
- Curing: The curing process, including temperature and time, determines how fully the puff additive is activated and, therefore, how high the puff will be.
- Design Choice: The design itself can influence how noticeable the puff effect is. Simple, bold designs often make the puff effect more apparent, while intricate designs might not showcase the puff as effectively.
Understanding these comparisons helps you make informed decisions when creating puff prints, allowing you to tailor the process to your specific needs and achieve the desired results. Mastering how to do puff print involves understanding the nuances of these variables.